Building a Desktop Plugin - Setup
Now that the native side is covered (see the previous pages in this tutorial), it's time to display the data you're sending on the desktop side.
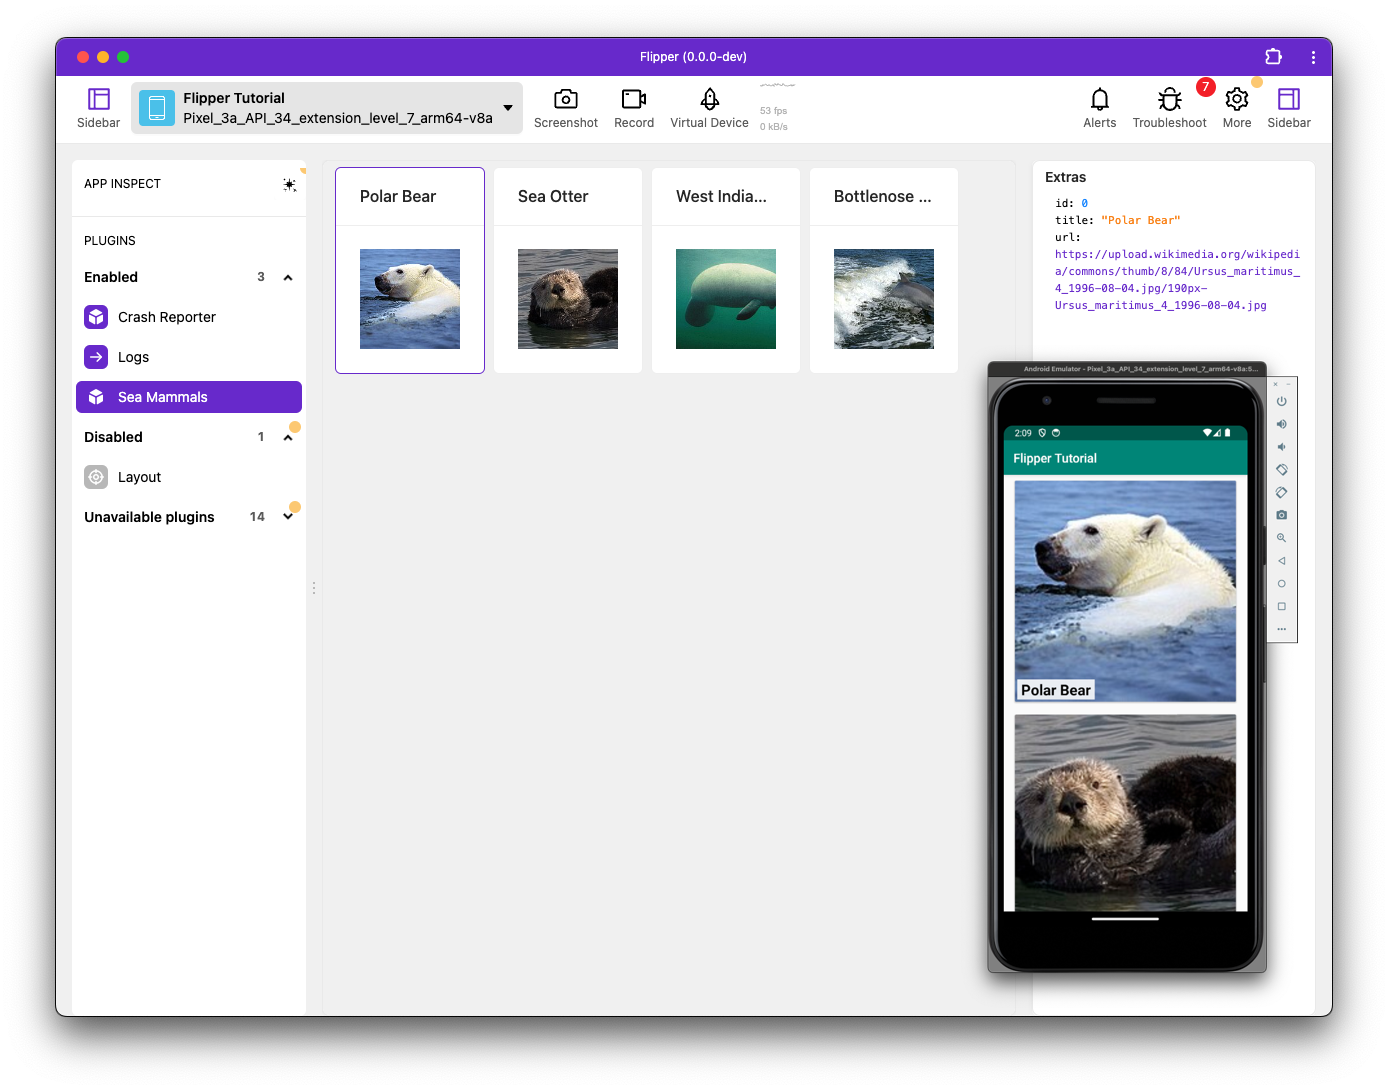
The following desktop screenshot shows the 'Sea-mammals' plugin, of this tutorial, in action.
Scaffolding a new Desktop plugin
A new Flipper Desktop plugin can be scaffolded by running npx flipper-pkg init in the directory where you want to store the plugin sources.
Don't run this command inside the Flipper repository!. Before running this command, make sure Flipper is closed.
The following snippet shows an example:
mkdir ~/FlipperPlugins
cd ~/FlipperPlugins
npx flipper-pkg init
Add the directory (shown in the snippet) to the Flipper watch folder if asked.
In this tutorial, you'll be creating a client plugin. device plugins are only used when creating plugins that don't connect to a specific application.
Take the following steps for npx:
- The npx tool asks you to provide the 'id' and 'title' for your plugin. For the sake of this tutorial, use 'sea-mammals' as 'id' and 'Sea Mammals' as the 'title'.
- The npx tool creates two files in the directory:
package.jsonandsrc/index.tsx. - After the process has finished, use
yarn watchin the generated directory to start compiling the plugin on the fly.
Now that the package has been set up, you are ready to build a UI for your plugin. This can be achieved either by using a standardized table-based plugin, or by creating a custom UI.
For more background on the generated files and overall plugin structure, see the Plugin Structure page.